On April 2nd, Internet Initiative Japan Inc. (IIJ) released the prepaid SIM card "JAPAN TRAVEL SIM for Unlocked phone" for tourists visiting Japan. As the name suggests, it is intended for use with SIM lock-free or unlocked smartphones and tablets.
The big difference from the conventional "JAPAN TRAVEL SIM" is that it is a "full MVNO" version where IIJ handles the subscriber management function itself (reference article). The SIM card is not supplied (loaned) by NTT DoCoMo, but an IIJ original.
What is the full MVNO version of JAPAN TRAVEL SIM like?
I decided to purchase the 3GB version and try it out. In this article, we will summarize the steps to make the SIM card usable.
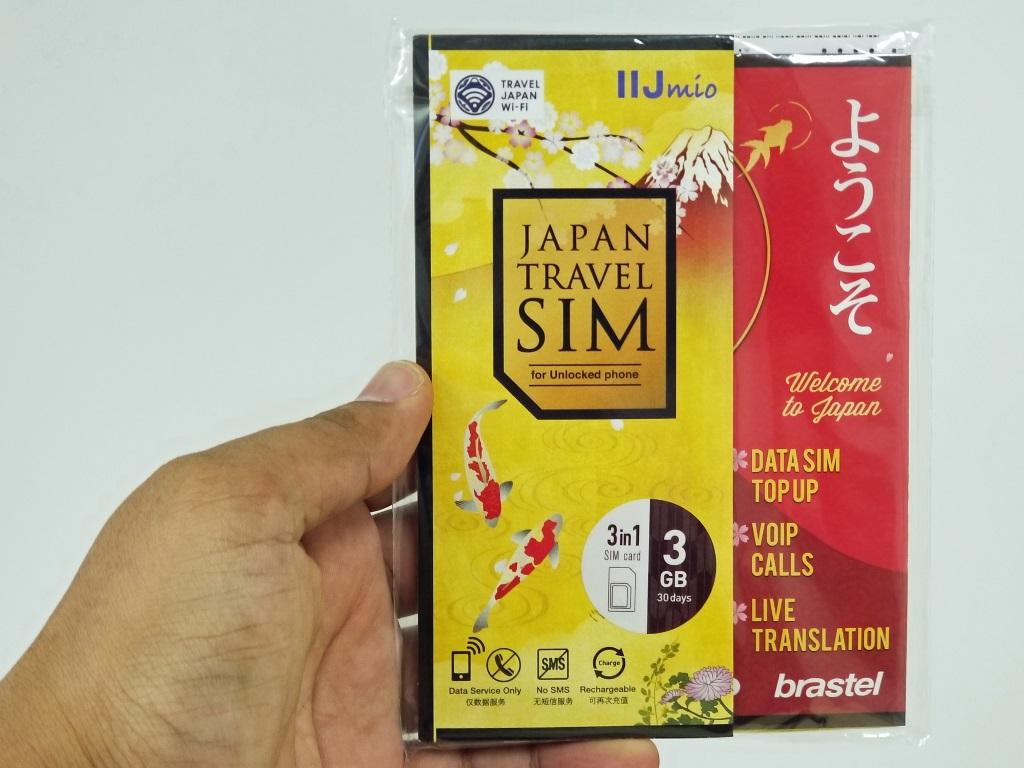
JAPAN TRAVEL SIM for Unlocked phone package (3GB version). Bic Camera Group (Bic Camera, Kojima, Sofmap) has a slightly different package design (reference image)JAPAN TRAVEL SIM for Unlocked phone package includes the following.
The accessories are almost the same as the conventional JAPAN TRAVEL SIM.
The package mount is in the style of a folding screen, and we are conscious of taking it home as a souvenir. More or less, prepaid SIM cards for tourists visiting Japan often include such "souvenir" elements.
The Brastel card is a prepaid card for international calls. If you install a dedicated app (Android version / iOS version) on your smartphone and sign up using this card, you will be given an IP phone number starting with 050. If you prepaid with a credit card or cash, you can make domestic and international calls at low cost, and you can also purchase additional data capacity for JAPAN TRAVEL SIM (*).
*Additional capacity can be purchased (charged) with the "IIJmio Coupon Card" (including the digital version) sold at convenience stores and electronics retailers.
[Correction] When the first draft was posted, it was written that the "gem clip" was included, but it turned out that it was not originally included. I apologize and correct it (20:05)
Inside the package The back side of the package mount is a folding screen that can be used as a souvenir.The big difference between this package and the conventional version is the SIM card. As mentioned above, the original SIM card issued by IIJ itself is included. It is a "multi-SIM card" that is starting to be used in some parts of Japan (reference article 1/2), and it can be cut into 3 sizes, "normal", "micro" and "nano", according to the terminal to be used.
Two passcodes (personal identification numbers) are pasted on the back of the mount. The passcode is necessary for activating the SIM card and charging additional capacity, so be sure not to lose it.
IIJ original SIM card. The two passcodes on the back are necessary for activating the SIM card and charging additional storage, so be careful not to lose them
After checking the contents of the package, set up the SIM card. I used my own "Galaxy Note8 SC-01K" terminal. Of course it is SIM unlocked.
The setup procedure is written on the package mount, user manual, and SIM card mount package. I think it's easiest to follow the instructions on the SIM card package (except for some settings). Roughly speaking, it is as follows.
When I insert the SIM card and turn it on, it says "No network connection". Although the SIM card is recognized normally, there is no network to connect to, and the phone number is "unknown".
When I insert the SIM card for the first time, "There is no network connection" is displayed (photo = left). The phone number is also unknown (photo = right)I have various concerns, but I will proceed with the APN settings regardless. APN-related settings are the same as conventional IIJmio. For Android devices, settings can be made in the same way as IIJmio.
For Android devices, it is OK if you set it in the same way as the conventional IIJmioAs the newly added note, JAPAN TRAVEL SIM for Unlocked phone requires manual APN setting when using it with an iPhone or iPad. is. You can enter the APN by opening the terminal settings and going to "Mobile communication" → "Communication options" → "Mobile data communication network".
The entry fields are divided into four: "Mobile data communication", "LTE settings (optional)", "MMS", and "Internet sharing", but you can enter the same information in three of these except MMS is. As far as I tried, it seems that both "mobile data communication" and "Internet sharing" can be used without problems.
For iPhones and iPads, you need to manually set the APN (the image is for "iPhone X"). Since this input field can be hidden in "Carrier settings", it will not appear if you have a SIM card from a domestic carrier (NTT docomo, au, Softbank) Restart. This is actually very important. After restarting, the phone number will be written to the SIM card and you will be able to communicate.Your assigned phone number starts with "020". This is assigned to dedicated data communication terminals such as M2M (machine-to-machine communication). When I called this number from NTT Docomo and Softbank (Y!mobile) mobile phones, I heard an announcement that I had never heard before, saying, "We are currently unable to connect to this number." .
Aside from whether it will be connected in the future, I was able to confirm that it is not compatible with voice calls. If you really want to make a voice call, use the Brastel IP phone mentioned above.
JAPAN TRAVEL SIM for Unlocked phone is assigned a "020" number exclusively for data communicationIf the connection is successful, "IIJ" will be displayed as the operator (carrier) name. In a way, it's an emotional moment.
The operator name is the letters "IIJ"You can use the Internet... Finally, you need to access the dedicated site from your smartphone's web browser and register as a user.
When registering as a user, a passport number is required for identity verification. Have your passport ready in advance. You also need to specify the date when you plan to start using data communication. Without hesitation, I chose "immediately".
User registration screen. If your nationality is Japan (Japan), select "temporary stay" or "permanent residence"If you set the scheduled start date to "immediately", you will be connected to the Internet within a few minutes after completing user registration. It will be ready. Now let's jump into the internet world.
Registration completion screenThe above is the procedure to start using. I'm going to use it in various ways from now on, and I'll try to summarize the feeling of use in about a week. looking forward to!
Copyright © ITmedia, Inc. All Rights Reserved.


 --PHILE WEB")
 --PHILE WEB")


